
 |
| Removing basic blotches, blips, stray hairs and blemishes is a fast and easy process. |
A lot of lolitas have a bias against over-processing or editing their photos, but removing a blemish or two for the sake of a nicer image can be done without a big production.
Every photographer has their personal techniques and preferences, in this series, I'll talk a little bit about my basic process for preparing and editing photos. These little tutorials are mostly for beginners, rather than Photoshop experts, but will become more advanced as they progress.
For this particular post, I will discuss a simple way to remove stray hairs that obscure the face as well as small blemishes, freckles and spots.
 |
| Viewed close up, you can see some of the little flaws in a photo. |
This part is really obvious, but you need to take a photo in order to edit one!
What's less obvious is that you should prepare it before editing by making sure that your white balance, contrast and color balance are all adjusted to the levels you desire. These settings are a matter of personal preference, but I prefer to make sure that my image isn't too contrasty or over-exposed.
This technique is meant to be subtle and realistic, rather than turn you into a plastic or porcelain doll. It's okay to have pores and texture to your skin! In future, I'll address more extreme techniques, but for this particular post, we'll keep things simple and as close to natural as possible.
As an additional note, this technique will work best for portraits, but can also be allowed to full-body images with clear faces.
Step Two: Identify the problem areas.
Most photos don't need significant editing, but just a few little minor touches to clean up some problem areas. Even the most beautiful of models, with professional make up artists to disguise any potential issues, still need the occasional assistance from a photo retoucher.
 |
| Determine what you want to change. |
Sit down and look at your image to decide what you want to alter. Look at the photo at 50%, 100% and 200%. Different sizes will reveal different things that you may wish to edit.
In my case, I am most definitely not a model and my make up skills are far from professional grade! I have a few freckles and acne scars I prefer to remove from my photos and in the case of this image, I have a few hairs from the wig that criss-cross over my face that I would like to remove. In the thumbnail above, I have selected the largest and most obvious of said blemishes.
You don't need to mark out your issues, obviously. Just recognize and remember what you want to change.
 Step Three: Get to work!
To start out, pick the areas that spread over the "most" space. For my example, I chose the hairs crossing my forehead.
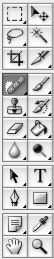
For this technique, choose the "healing" tool from the toolbox menu (as shown to the right; it looks like a little bandaid). Set the brush to a 0% hardness and choose the smallest brush that you can for the blemishes in particular. You want to be as accurate in "brushing" over the blemishes as possible, in order to prevent "scarring" where the edits don't match up with the original.
Create a new layer over your photograph (I name this layer "Healing Layer 1") and select the "Proximity Match" radio button and "Sample All Layers" check box. Now, you can start painting. I use a tablet for my photo editing, but a mouse works just as well. Zoom in to 200% or higher, so that you can see the individual pixels that you'll be brushing over.
Go slowly. Work in small sections at a time until each hair is gone. To test whether it looks realistic or not, toggle the visibility on and off on the healing brush layer.
 |
| No more hairs! But still some little blemishes to deal with. |
The final step is to get rid of the blemishes still left. The process is the same as with the hairs.
I always make a second new layer for the blemishes (I name this layer "Healing Layer 2"; each new "type" of change I make, I use a new layer for the sake of organization). After turning off the visibility for the layer of hairs that I've edited, I repeat my process.
 |
| Tadaaaaa! And no one but me (and now you) would know it. |
Step Four: Self-critique the image.
Once you've finished your editing, take a few minutes to an hour away from the screen. Then, come back and view it at 100%, 50% and 200% to see if you missed anything.
Leaving the image along for this period of time allows your brain to switch processes from the "creative" used to edit the image to the "analytical" used to examine and correct any flaws still in place. If you see something else that needs tweaking, go from there and correct the remaining issues. Repeat the self-critique process until you're satisfied.
I hope you found this tutorial useful! If you have any questions, comments or contributions, please feel free to post in the comments below!
For the next tutorial, I plan to touch on the use of dodging and burning to reduce small wrinkles and enhance already existing features.
4 comments:
I do like. It's not changing your image enough to argue that it's no longer a pic of you. very nice job.
I like this tutorial a lot! Thanks!
Is this done with Photoshop? I haven't seen the healing brush before
Oh I found the healing button XD But I can't find "Proximity Match" or "radio button" or "Sample All Layers" check box D: Where are they?
Up at the top in the options menu! :)
The little bar that should be across the top by default has the settings for size/hardness/etc. and they should be to the right.
Post a Comment